How to Use Visio
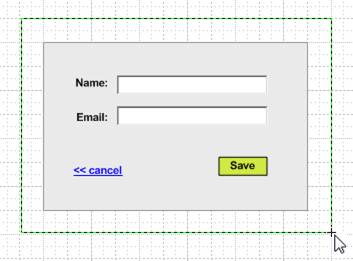
You can use Visio to depict what you want a webpage to look like—a dropdown menu here, a link over there, a green button right here. Here are some Visio “basics” that aren’t so basic if you don’t know them. You can also use Visio to do other things like create workflow diagrams. I do not discuss those other topics here.
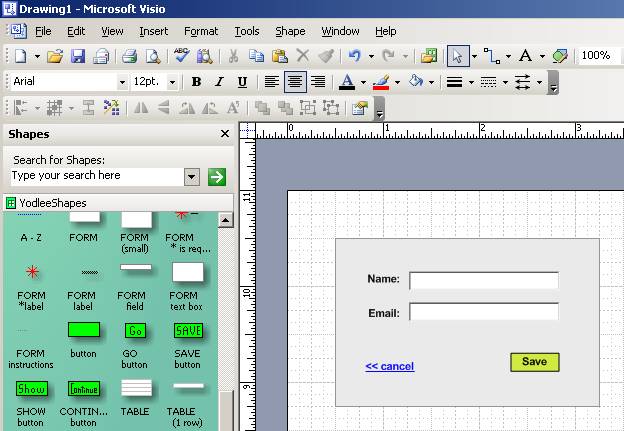
To start drawing a page, open a new Visio document, open a stencil, and start dragging things out of the stencil. Stencils make it so that you don’t have to reinvent the wheel (or the blue, underlined link from plain black text) every single time. You can modify or create a stencil but I won’t cover that here.
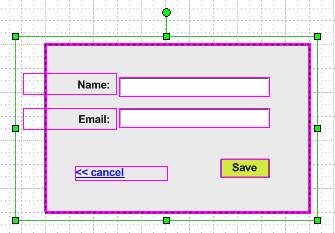
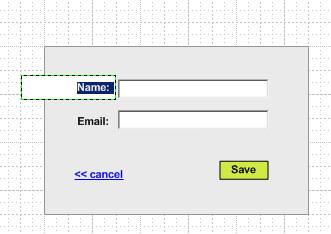
To select something, you click on it. For example, to select the text ‘Name:’ on a form, you click on the word ‘Name:’.
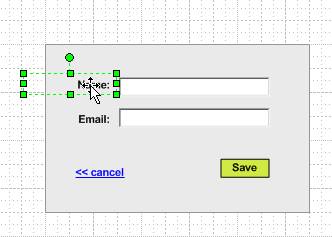
(Click once and ‘Name:’ is selected.)
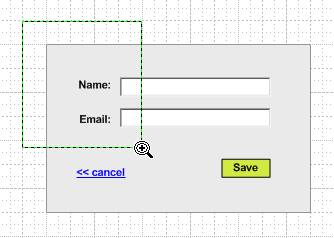
To select something that is underneath something else, you click again until the thing that you want to select is selected. For example, if the word ‘Name:’ is part of a form and is on top of the form box, then by clicking on ‘Name:’ you will probably select ‘Name:’. If what you want to select is the form box, not ‘Name:’, then click again (on the same spot) until the form box and not ‘Name:’ is selected, like so:
(Click a second time and the form box underneath ‘Name:’ will be selected.)
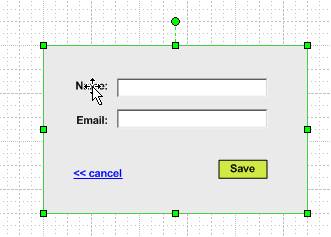
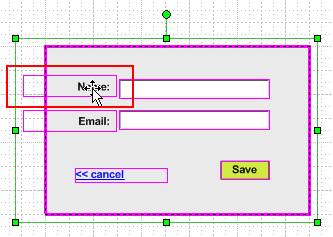
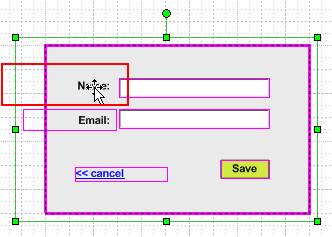
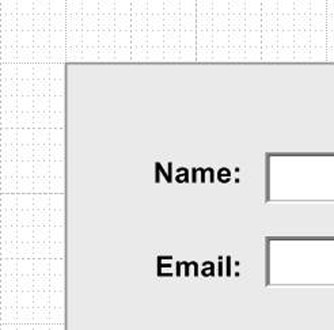
In this particular case, if what you wanted to select was the form box, it would be quicker to click on a part of the form box that looks like it has nothing above it, somewhere like here:
If you click here, then Visio knows you’re trying to select the box because it’s the only thing you could be selecting, whereas if you click over ‘Name:’, then Visio doesn’t know if you want to select ‘Name:’ or something that’s below ‘Name:’, like the form box.
To select multiple objects (Method 1), click and drag the mouse around the things that you want to select.
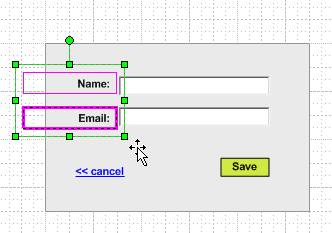
To select multiple objects (Method 2), you can also click on one object, hold down the SHIFT key, and click on another object.
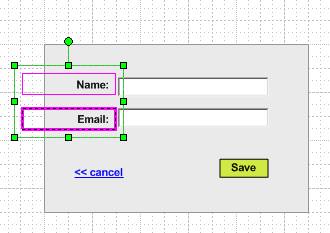
To unselect one of the many things you have selected, hold down the SHIFT key and (while holding down the SHIFT key) click on the thing that you want to unselect. Below, many things were selected and then ‘Name:’ was unselected. You can see that it is no longer selected because it no longer has a purple box around it.
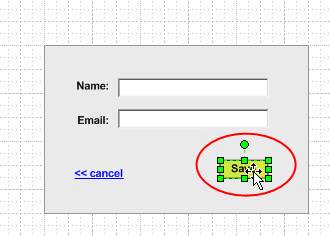
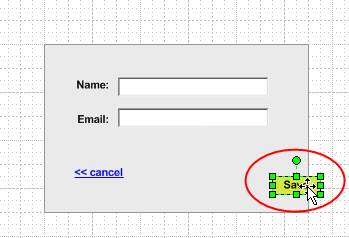
To move an object left, right, up, or down, click and hold and drag the object where you want it to be.
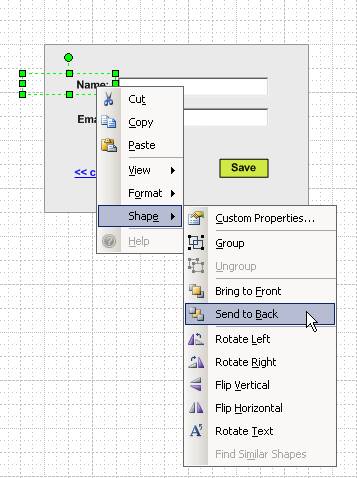
To move an object so that it is in front of or behind other objects, right-click on the object, go to ‘Shape >’, and then choose ‘Bring to Front’ or ‘Send to Back’. These will do just what you’d think they would do. If you need more subtle movement than that, then go to the top menu called ‘Shape >’ and choose ‘Order >’, and then choose ‘Send Forward’ or ‘Send Backward’. These commands move the selected object(s) forward/backward one layer at a time.
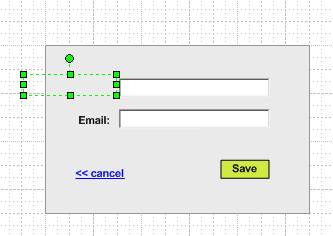
Here ‘Name:’ is still there and is selected but it is behind the gray form box.
To quickly copy an object, hold down the CTRL key and drag a copy out of the original.
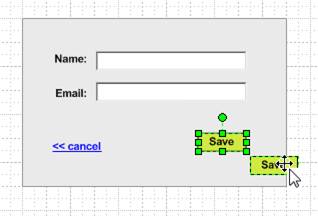
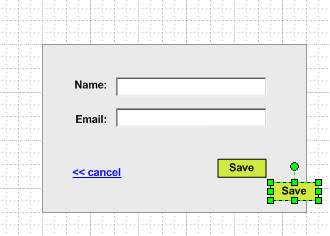
You can also select multiple objects and then drag out a copy of the group.
When you drag out an object that has text from the stencil, you can just start typing—you don’t have to double-click it to open it for editing. This applies to the text in dropdown menus, error messages, the empty text fields, the radio buttons that come with text, the checkboxes that come with text, page titles, page subtitles, links, etc.
To edit the text in the objects mentioned above without losing the information that’s already there, you double-click on the object you want to edit.
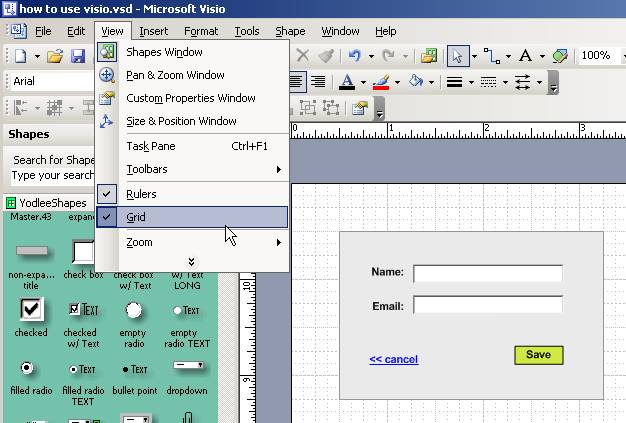
If you don’t like looking at the grid, then you can make it disappear by going to the ‘View’ menu and choosing ‘Grid’. Then you’ll be working with a plain white background. I kind of like the grid, though, because then you know that any white that you do see is part of an object and not just the background.
To make it easier to select multiple objects that collectively are kind of big, you can zoom out to a 75% or 50% view.

To move objects in really small increments, zoom in to 200% or 400%.
You can zoom in and out using the toolbar, but it takes a little time.
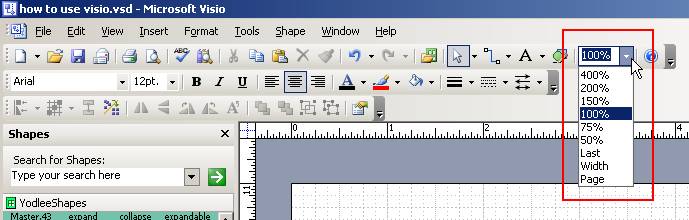
To zoom in and out more quickly, hold down the CTRL key and then roll the click wheel on your mouse. It will zoom in and out centered on where your mouse pointer is at the time.
Another way to zoom in quickly is to hold down the CTRL key AND the SHIFT key and drag a rectangle around the area you want to zoom in on. This area will then become your entire screen.
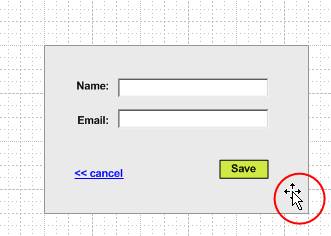
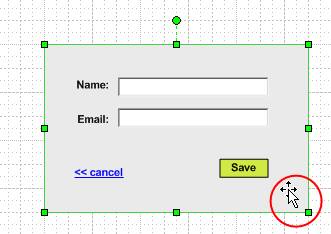
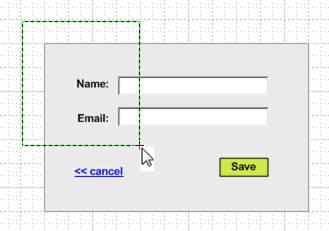
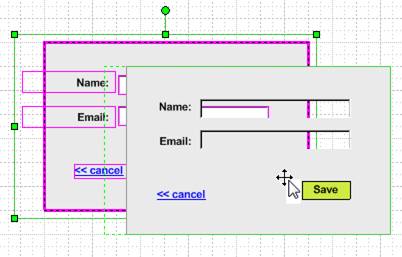
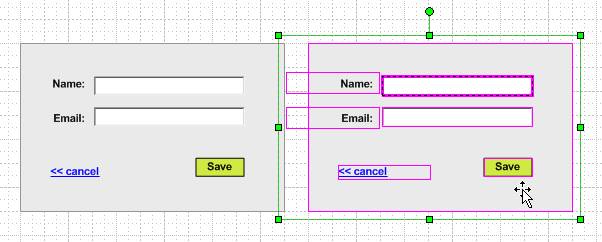
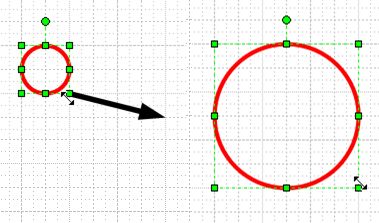
To stretch or shrink something, grab an edge or corner and click and drag it to where you want it.
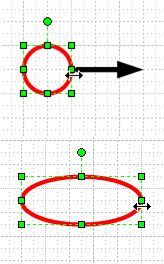
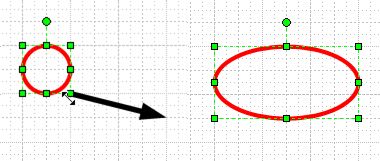
When you are stretching something from a corner, it will remain in scale. If you don’t want it to remain in scale, then hold down the SHIFT key before you click and drag the corner. This allows you to stretch the object left or right and up or down in one motion without keeping everything in its original proportions.
Without holding the SHIFT key:
Holding the SHIFT key:
To scroll up and down on the screen, roll the click wheel on your mouse.
To scroll right and left on the screen, hold down the SHIFT key and roll the click wheel on your mouse.